Introduction
Under NeetoCRM, an organization can enable and integrate WhatsApp Business Accounts(WABA) with linked phone numbers, to which your agents can reach out for leads/deals via WhatsApp.
NeetoCRM depends on adding WhatsApp templates to initiate conversation and send messages to leads and contacts (Refer - Handling WhatsApp message templates). Agents can initiate the WhatsApp message, which uses the WhatsApp template, from NeetoCRM and the message will then be reflected in the visitor’s WhatsApp inbox. NeetoCRM uses webhooks to receive the statuses of messages sent.
Onboarding phone number to WhatsApp Business Platform
⚠️ Onboarding a phone number is required to enable receiving messages from WhatsApp users, and proper functioning of NeetoCRM Whatsapp Integration.
If the phone number is currently registered with WhatsApp Messenger or the WhatsApp Business App, it needs to be deleted first. See Migrate an Existing WhatsApp Number to a Business Account
Please navigate to the Meta App that is set up for WhatsApp by going to
developers.facebook.com > My Apps > Select your App.
Use the left menu to navigate to the WhatsApp > API Setup panel.
On the right pane, select the Add phone number button under Step 5: Add a phone number.
Use the display name guidelines to enter a display name for your phone number. This is the name that will show for your business phone number once approved.
Select your Time zone. This will be used for WhatsApp Billing and analytics.
Select a Category for your business and enter a Business description.
Select Next to begin the phone number verification process.
Select your country code from the drop-down and enter the phone number you would like to register.
Select how you would like to receive your verification code, either by Text Message or Phone. Click Next to continue. You will need access to the phone number before selecting Next to receive the verification code.
Enter the verification code once received and click Next to continue.
The phone number will appear in the From drop-down menu of the Send and receive messages section of the panel.
Select the newly added phone number to begin sending messages.
If the phone number fails to register, a message will be seen below the drop-down that says "Please register your phone number to send messages." Click on the link to access the configuration screen, then click on the slider button next to Registered to register your phone number again.
For more details on how to `Adding a phone number to WhatsApp Business platform` visit -
https://developers.facebook.com/docs/whatsapp/cloud-api/get-started/add-a-phone-number
Migrate an Existing WhatsApp Number to a Business Account
You can use a phone number that is already registered with the WhatsApp Messenger or the WhatsApp Business App. Remember to back up your chat history from the WhatsApp Business App. These are guides on how to do so for Android or iOS.
⚠️ Once a phone number is migrated to the WhatsApp Business Platform, it cannot be used on the WhatsApp Business App concurrently. The number must be used either on the Business Platform or on the Business App
To migrate a number, you must first delete the WhatsApp Messenger or WhatsApp Business App account.
Open WhatsApp Messenger or WhatsApp Business app on your Android or iPhone
Navigate to Settings > Account
Select Delete my account. Messages sent to this phone number will be queued in the meantime
Follow the steps to delete the WhatsApp account for that phone number. It may take up to 3 minutes for the disconnected number to become available
For more details on how to `Migrate an Existing WhatsApp Number to a Business Account` visit -
Adding an onboarded phone number to client Facebook Business
-
Visit https://business.facebook.com/settings/people to add the Client's Facebook business account.
-
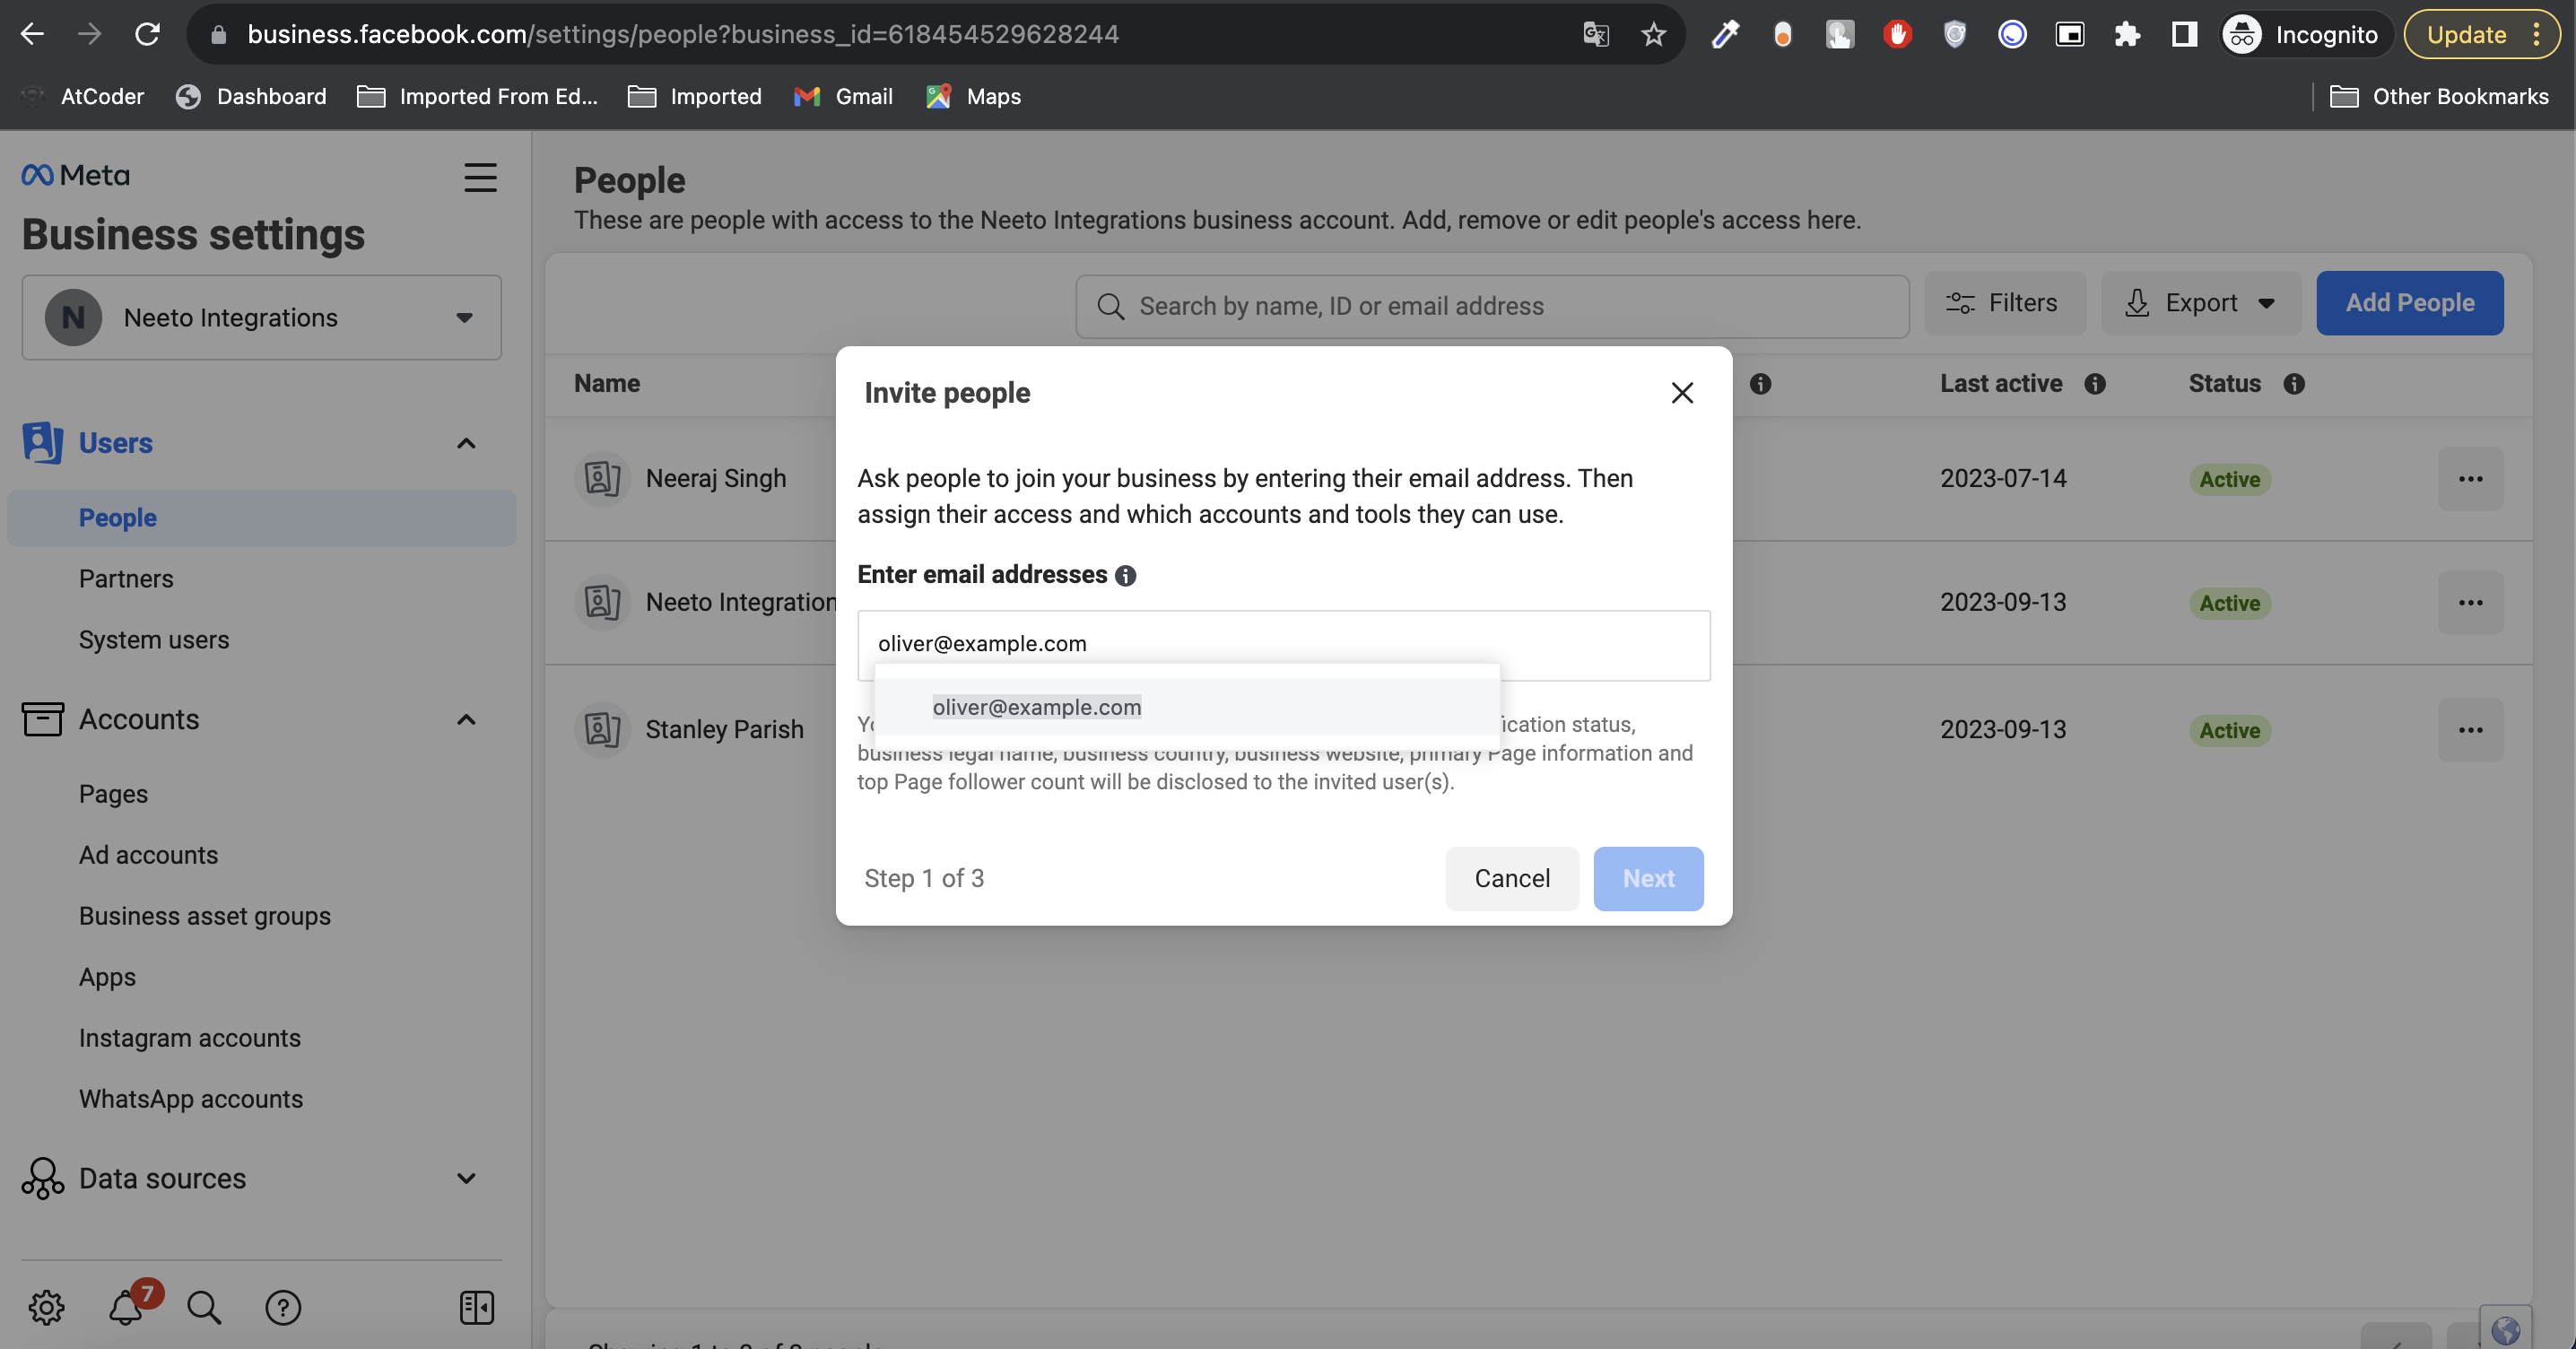
Click on Add People button, enter Client's email listed in the Facebook Business account, and go to next step.
-
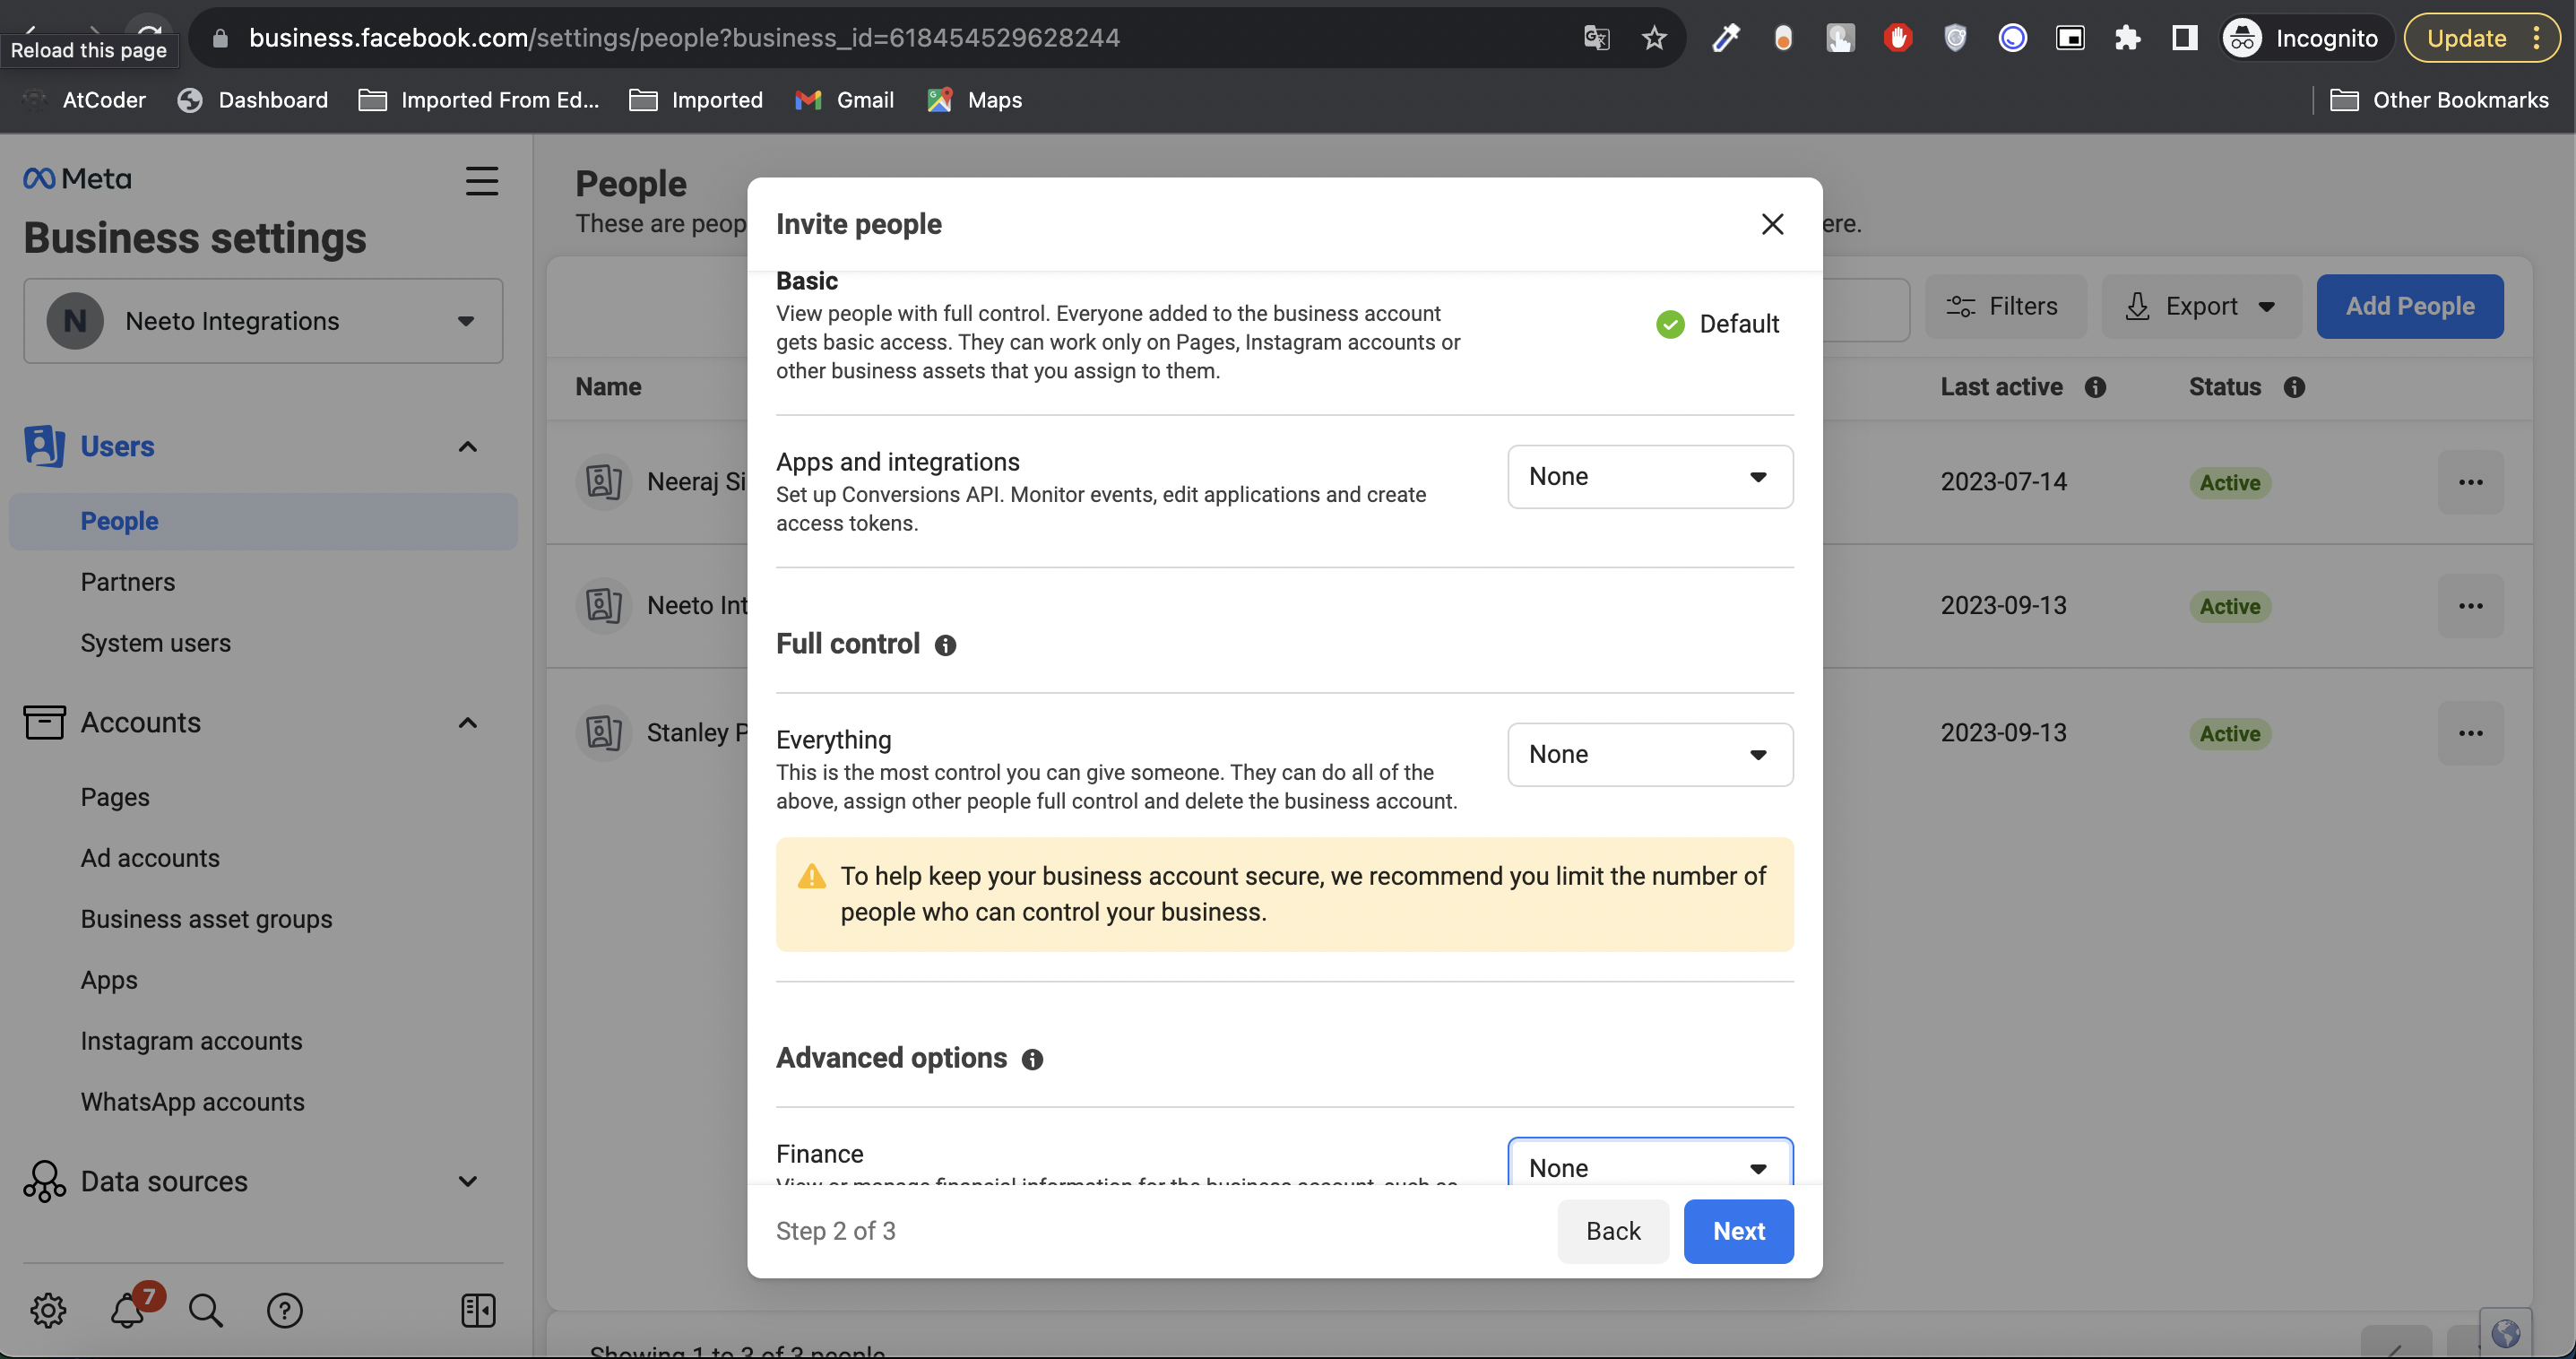
Ensure default permission are selected with Basic access, `None` selected in `Apps and integrations`, `Full control` and `Advanced options`.
-
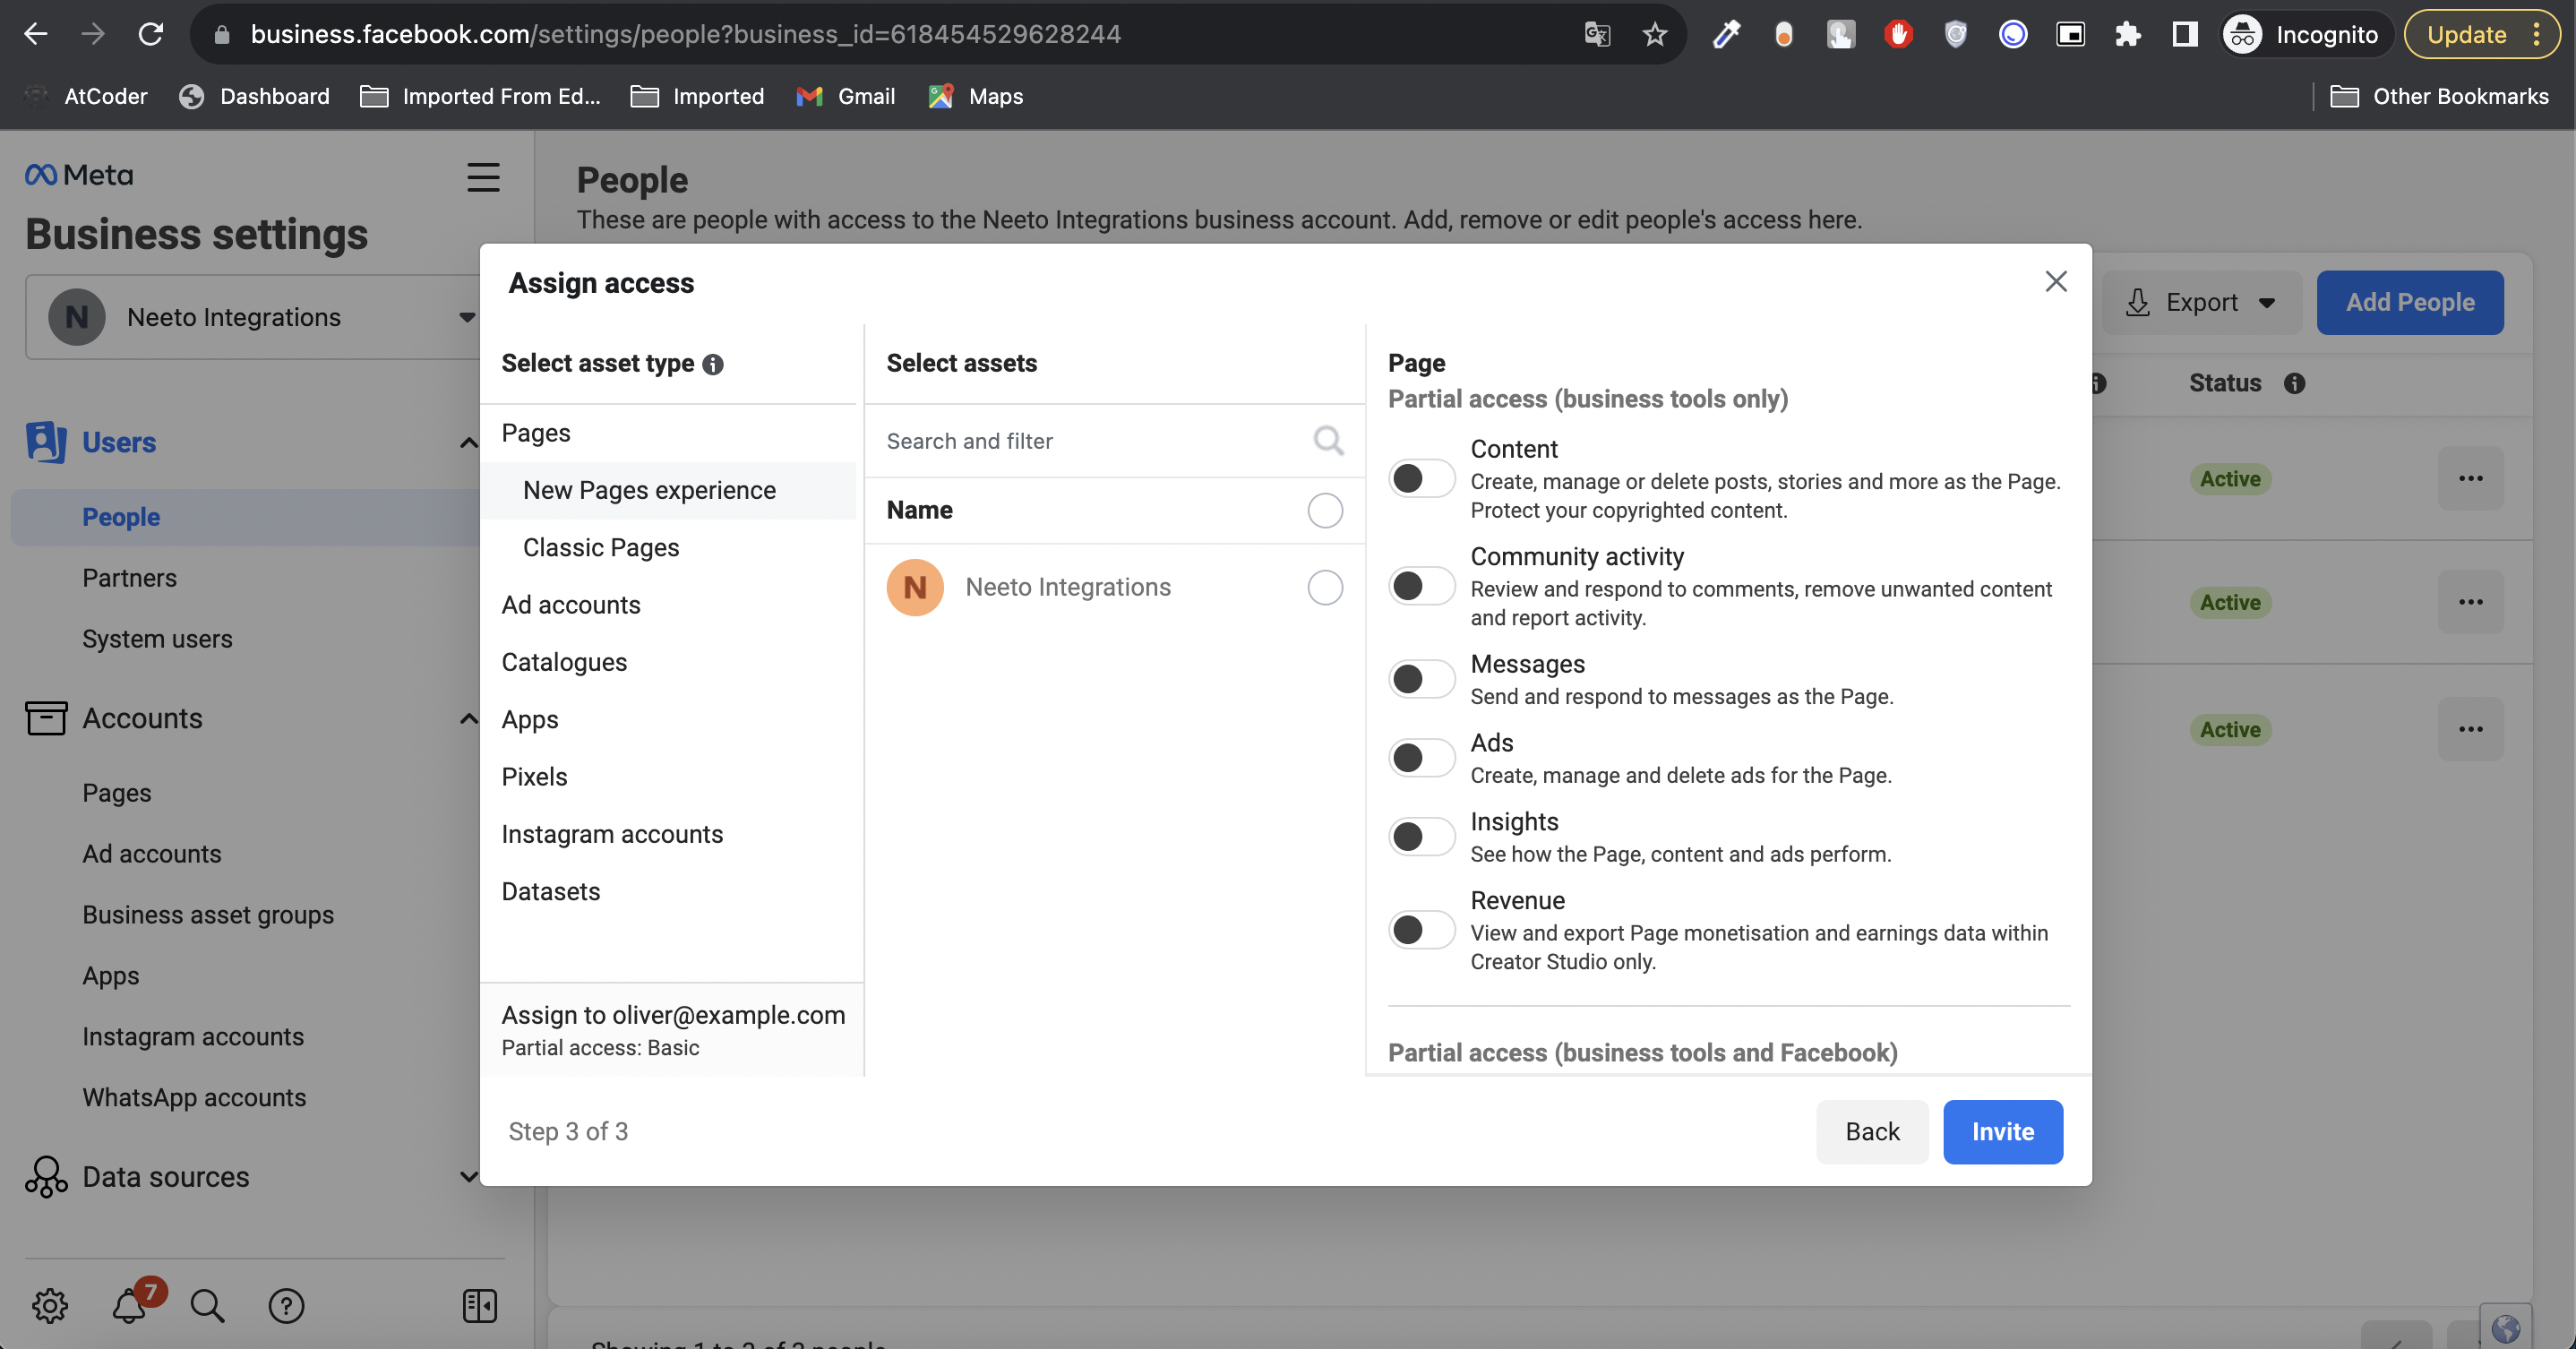
Press on Invite to send the invitation to access the phone number asset. No other action is required on final step before clicking on Invite.
Once the Invitation is accepted we proceed with the next step to add them to their phone asset.
-
-
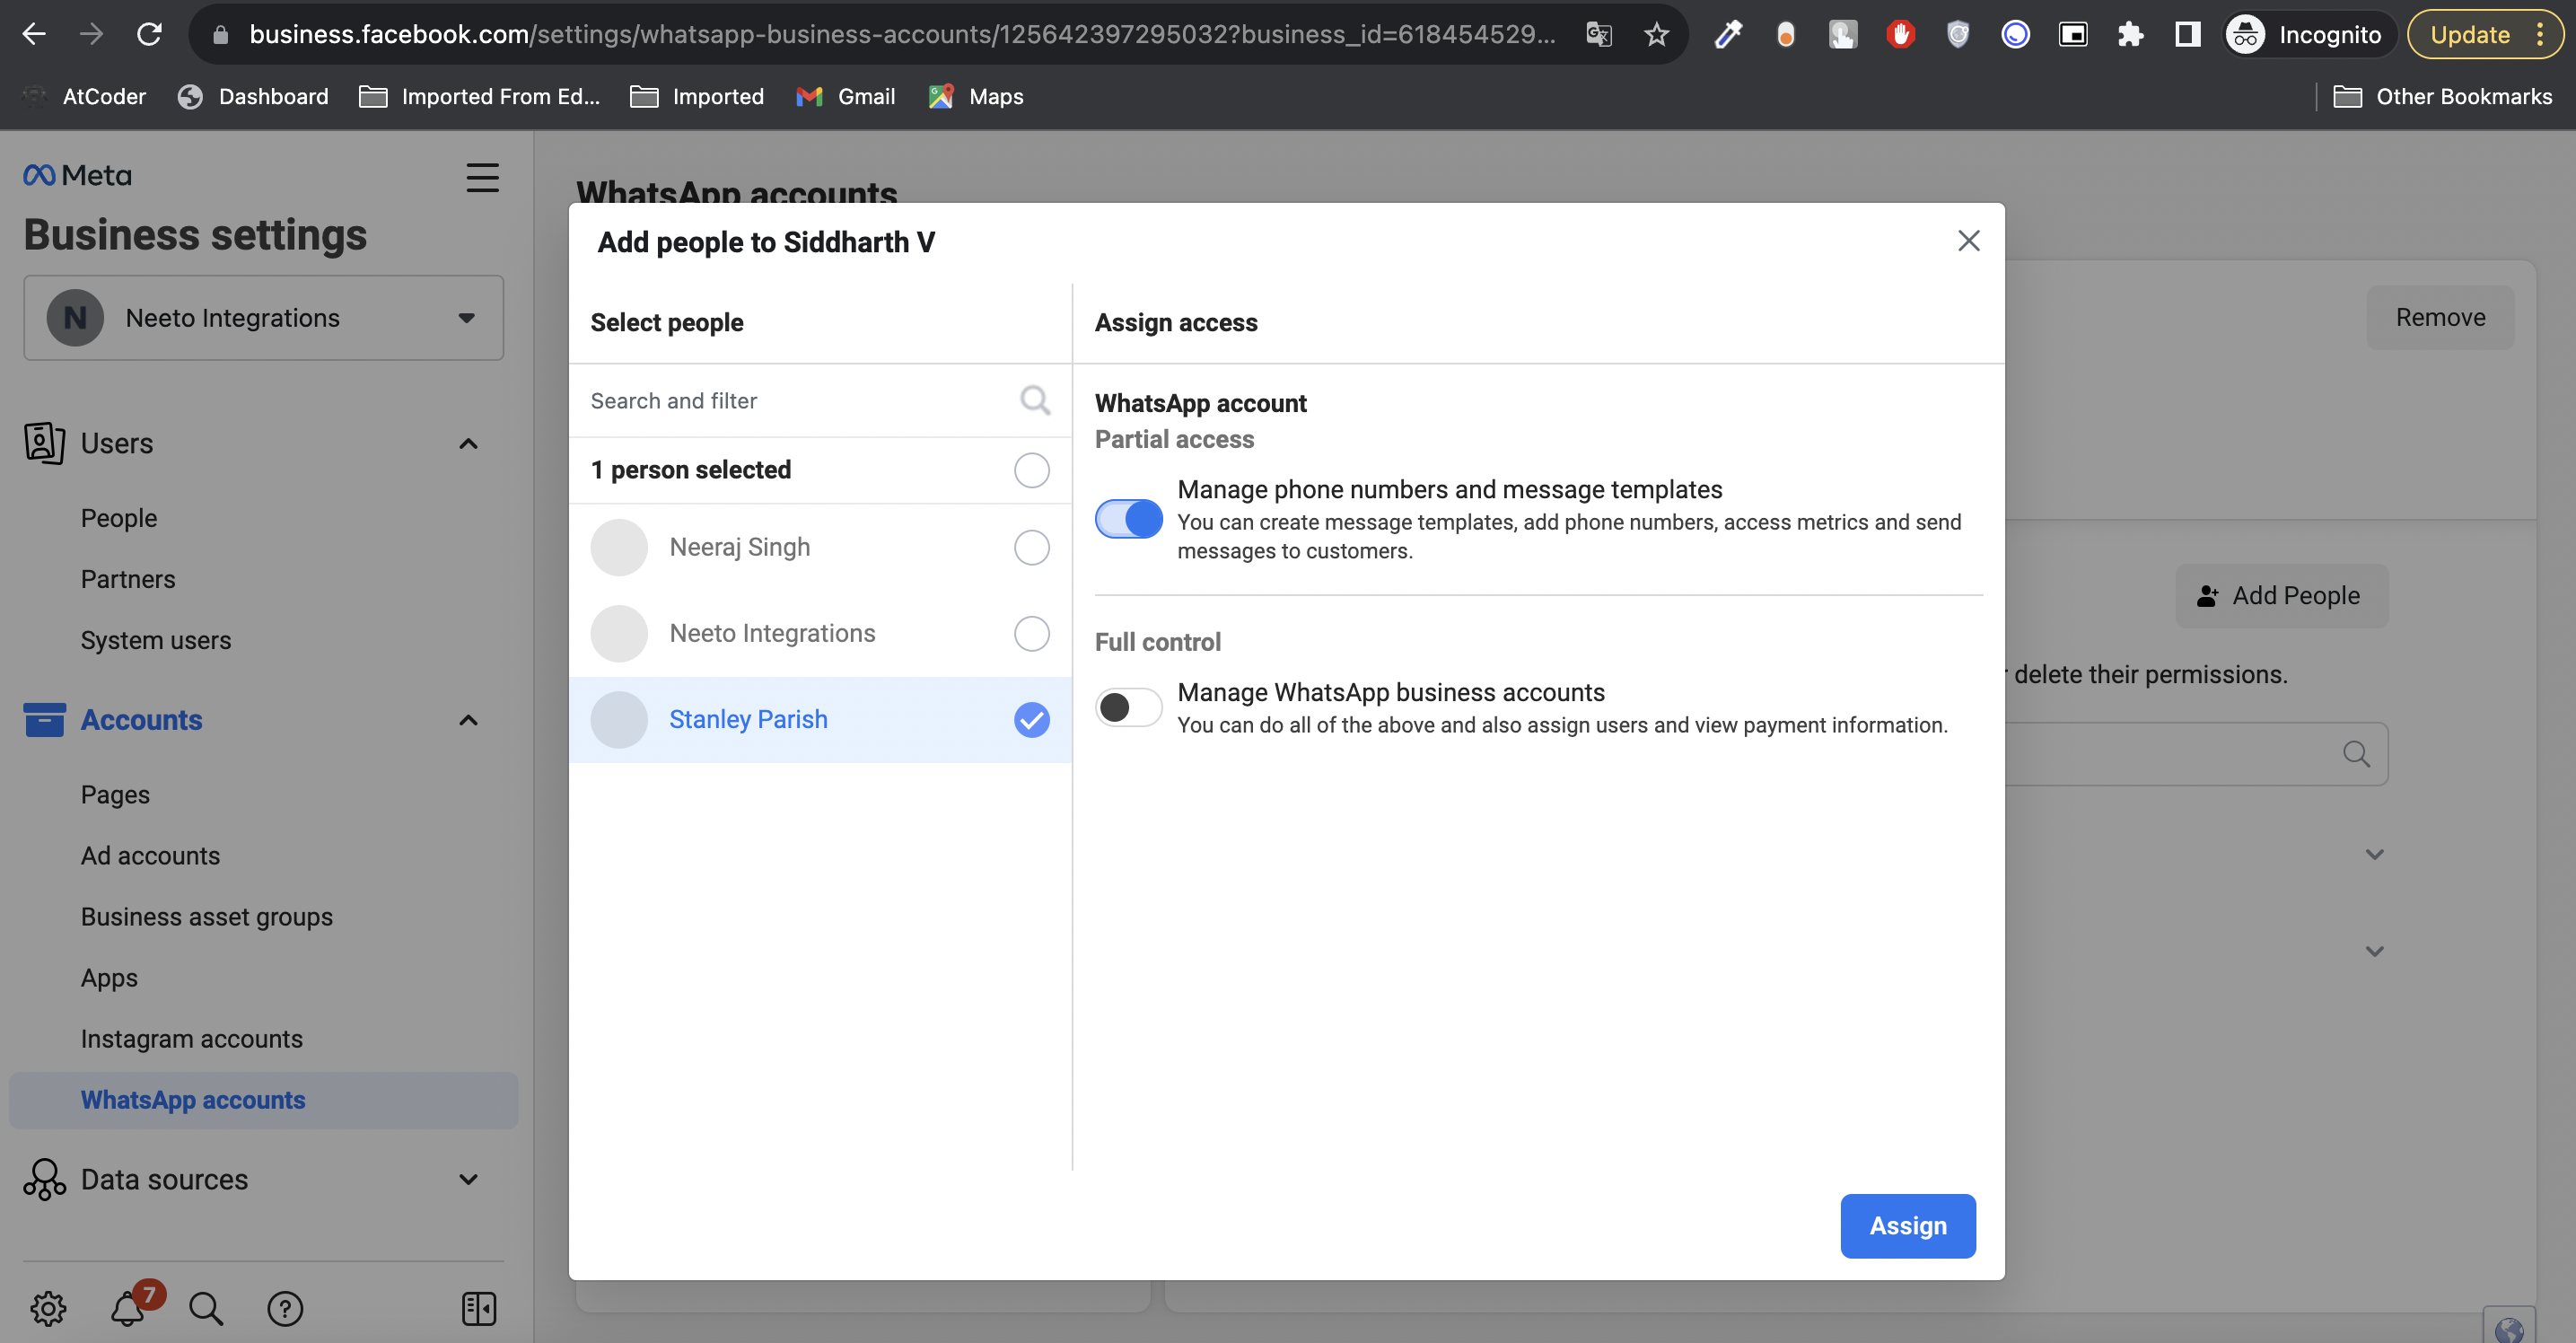
Go to https://business.facebook.com/settings/whatsapp-business-accounts/ and select the onboarded phone number account.
-
Press `Add people` and add the above-invited business client, and ensure to give personalized access based on requirement `Partial access` can be provided.
Once the client is added they will be able to access phone number-related APIs, details, and settings.
-
Handling WhatsApp Message templates
Templates are used in template messages to open marketing, utility, and authentication conversations with customers. Unlike free-form messages, template messages are the only type of message that can be sent to customers who have yet to message the business, or who have not sent the business a message in the last 24 hours.
Templates must be approved before they can be sent in template messages. In addition, templates may be disabled automatically based on customer feedback. Once disabled, a template cannot be sent in a template message until its quality rating has improved or it no longer violates our business or commerce policies.
Creation
Currently, the template creation process is manual through use the WhatsApp Manager to manually create templates.
Approval Process
Once a template is created it can be submitted for approval. It can take up to 24 hours for an approval decision to be made. Once a decision has been made, a notification will appear in the WhatsApp Manager and an email shall also be received to the Business Manager admins. In addition, webhook notification shall also be received if subscribed to message template status changes. See Monitoring Status Changes.
If your message template is approved, its status will be set to Active - Quality pending and it shall be ready for sending to customers. If it is rejected, edit and resubmit for approval, or appeal the decision.
For more details on handling templates - https://developers.facebook.com/docs/whatsapp/message-templates/guidelines
Troubleshooting
This section explains how to troubleshoot problems if encountered while using the API.
Message Not Delivered
Possible Reasons
The following scenarios can cause a message to appear as "sent" but not "delivered":
The customer did not come online during the 30 day window where we hold messages for offline customers.
The customer has blocked the business.
The customer is in a restricted or sanctioned country.
In all other scenarios, the API returns an error code with an error message describing the nature of the error. Example scenarios:
Invalid request parameters
Integrity errors
The customer has not accepted WhatsApp's new Terms of Service and Privacy Policy. Please send the end user this link: https://wa.me/tos/20210210 to accept the latest Terms of Service.
-
The customer is using an old version of WhatsApp. Customers should use the following version or greater:
Android: 2.21.15.15
SMBA: 2.21.15.15
iOS: 2.21.170.4
SMBI: 2.21.170.4
KaiOS: 2.2130.10
Web: 2.2132.6
The customer is part of an experiment group.
Reference for further updates - https://developers.facebook.com/docs/whatsapp/cloud-api/support/troubleshooting/


